2026 Guide to Oil and Stone Driveway Rejuvenation
Over time, even the most well-built oil and stone driveways begin to show signs of aging, faded color, scattered stones, minor cracks, and a dry, brittle surface. While these symptoms may seem like the beginning of the end, they don’t necessarily mean you need a full replacement.
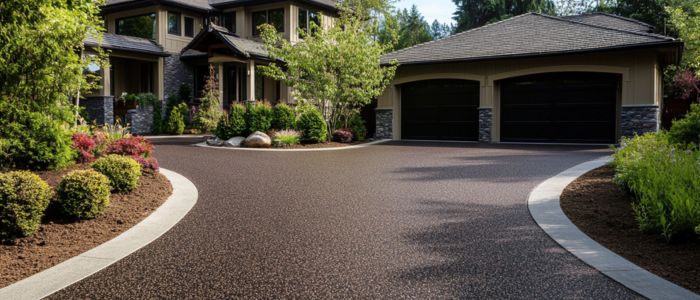
Oil and Stone Driveway Rejuvenation offers a smart, cost-effective way to restore your driveway’s appearance, texture, and durability without tearing it up or starting over.
Here’s a list of the topics featured in the article:
- What Is Oil and Stone Driveway Rejuvenation?
- Why Choose Oil and Stone Driveway Rejuvenation?
- How the Rejuvenation Process Works
- Rejuvenation vs. Replacement
- Driveway Maintenance After Rejuvenation
- Cost vs. Long-Term Value
- Eco-Friendly Benefits of Oil and Stone Driveway Rejuvenation
- Choosing the Right Contractor for Driveway Rejuvenation
- Case Studies: Successful Projects
- Frequently Asked Questions
- Final Thoughts
This 2026 guide explores how the rejuvenation process works, the benefits it offers, and how it compares to more invasive (and expensive) solutions like resurfacing or reconstruction. Whether you’re a homeowner looking to protect your investment or a property manager seeking long-term savings, this treatment could be the key to extending your driveway’s life while improving its performance and curb appeal.
For related surface treatments, you may also want to explore our guide on chip seal driveway maintenance.
What Is Oil and Stone Driveway Rejuvenation?
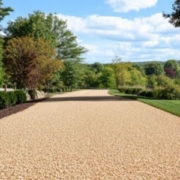
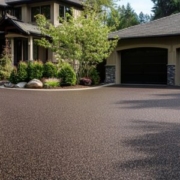
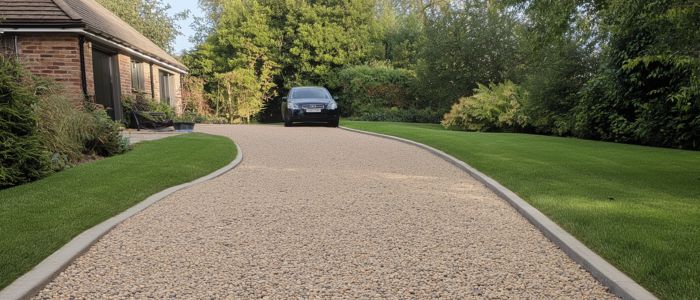
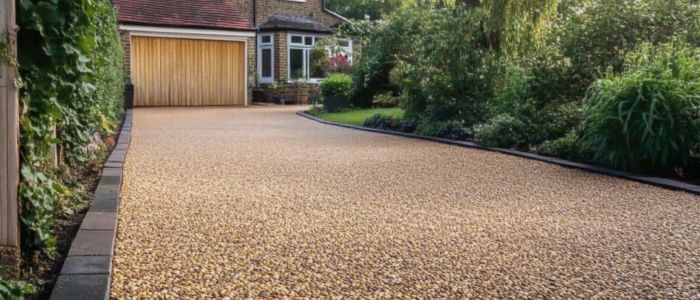
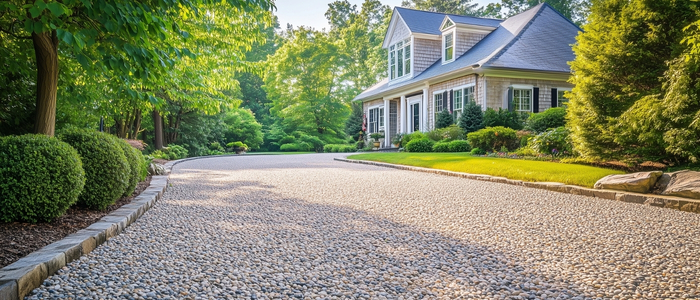
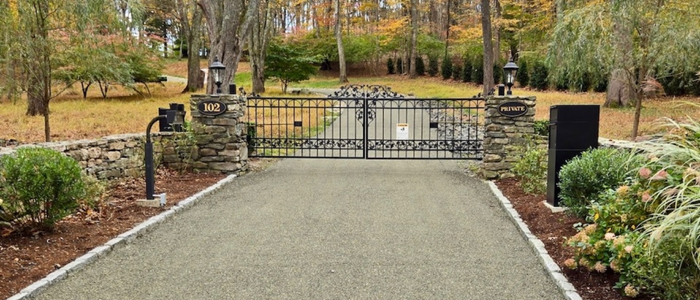
Oil and stone driveway rejuvenation is a preventative surface treatment designed to restore and extend the life of an existing oil and stone driveway. Rather than replacing the surface entirely, this method revives the aging pavement by applying a rejuvenating asphalt emulsion that penetrates and restores the original binder, followed by a fresh application of stone aggregate. This dual process brings back the dark, rich appearance of the driveway while also reinforcing its structural integrity.
The rejuvenation treatment works especially well on driveways that are oxidized, faded, or beginning to loosen at the surface, but still structurally sound. It seals small cracks, tightens the stone matrix, and reduces the risk of water infiltration, which is one of the leading causes of long-term driveway damage. It also enhances surface traction and provides a cleaner, more uniform finish that boosts curb appeal.
Why Choose Oil and Stone Driveway Rejuvenation?
Choosing oil and stone driveway rejuvenation isn’t just about giving your driveway a facelift; it’s a smart, proactive way to protect your investment and avoid costly repairs down the line. Here are the key reasons homeowners and property managers choose this method:
1. Extends Pavement Life
By restoring essential oils to the asphalt and embedding new stone into the surface, rejuvenation strengthens your driveway and defends against further oxidation, cracking, and surface breakdown. This means fewer repairs, longer lifespan, and lower long-term costs.
2. Cost-Effective Alternative to Replacement
Full driveway replacement is expensive and disruptive. Rejuvenation, on the other hand, delivers impressive visual and structural improvements at a fraction of the cost. For a breakdown of typical costs and comparisons, visit our page on chip and seal driveway cost.
3. Improved Surface Traction and Safety
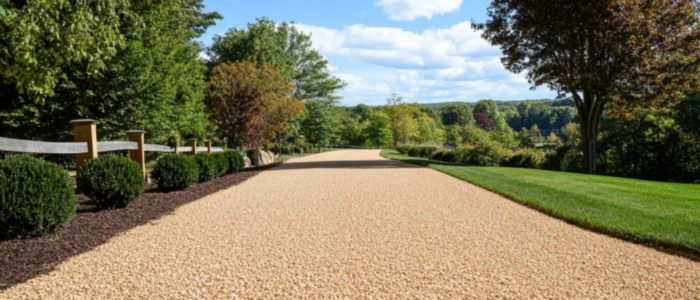
The fresh layer of angular stone not only enhances the look of your driveway but also improves traction—especially beneficial in wet or icy conditions. This textured surface is ideal for both residential driveways and larger rural properties.
4. Enhanced Curb Appeal
A rejuvenated driveway instantly improves the appearance of your property. The rich, restored color and clean stone surface give your home a polished look that adds value and charm.
5. Environmental and Resource Efficiency
Rejuvenation utilizes the existing pavement, minimizing waste and the need for new materials. This aligns with sustainable practices by reducing landfill use and lowering the environmental footprint of driveway maintenance. Learn more in our guide to eco-friendly driveway solutions.
How the Rejuvenation Process Works: Step-by-Step
Understanding the rejuvenation process helps homeowners see why this method is both effective and long-lasting. When performed by experienced professionals, oil and stone driveway rejuvenation can restore your surface in just a day while delivering benefits that last for years.
Step 1: Surface Inspection and Preparation
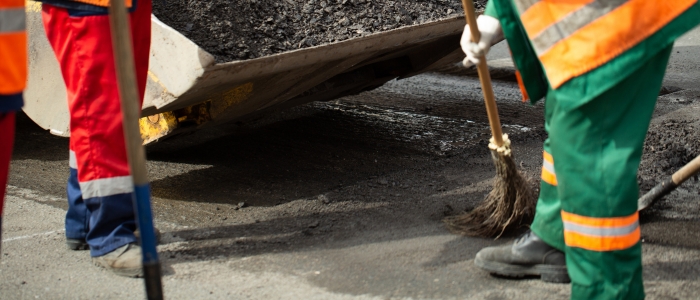
The process begins with a thorough inspection of the existing driveway. Technicians assess the condition of the asphalt, looking for oxidation, loose stone, and early signs of cracking. Any major issues—such as potholes or drainage problems—must be addressed first to ensure a successful rejuvenation.
Preparation includes cleaning the surface, removing debris, and trimming vegetation around the driveway edges. This ensures proper bonding between the rejuvenator and the existing surface.
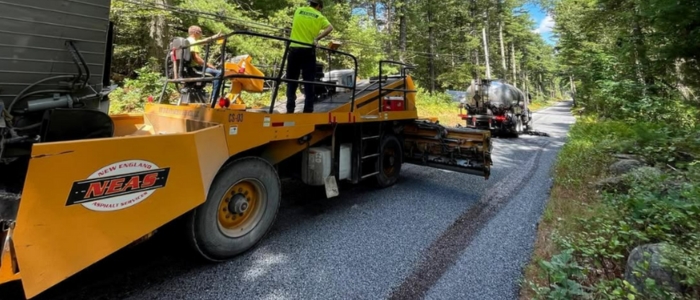
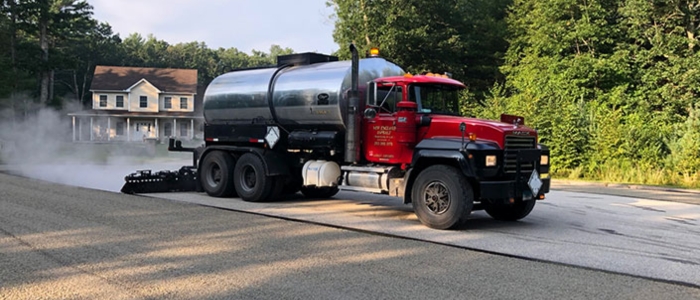
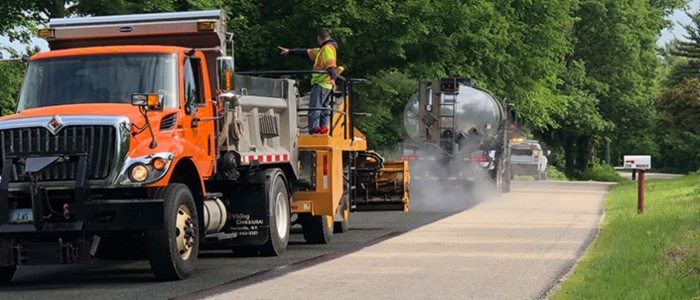
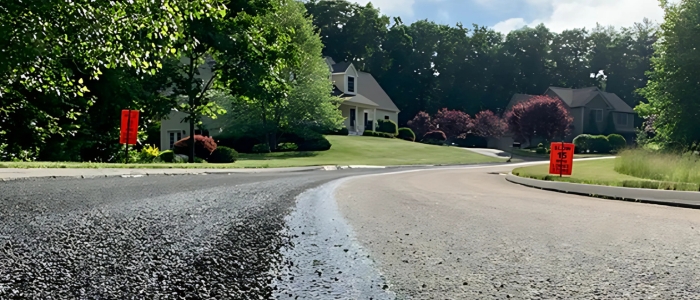
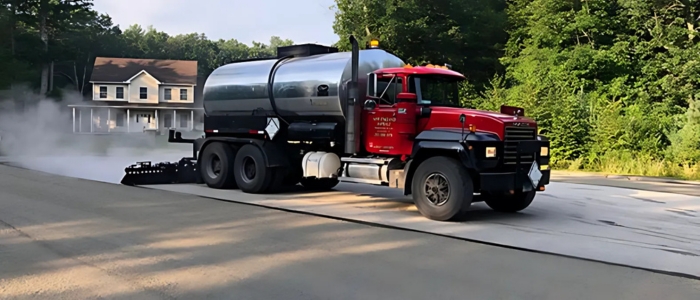
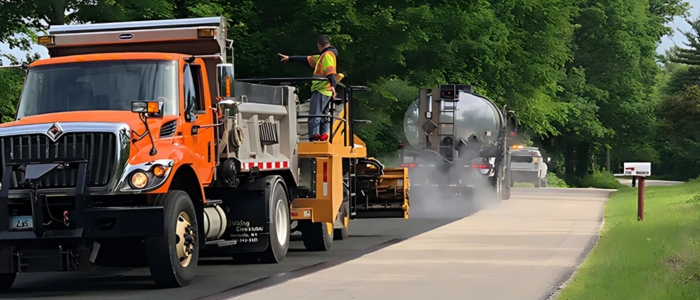
Step 2: Application of Rejuvenating Asphalt Emulsion
Next, a specially formulated asphalt rejuvenator is sprayed evenly across the driveway. This emulsion is designed to penetrate the existing pavement, restoring lost oils and increasing flexibility in the surface binder. Unlike sealcoating, which sits on top of the pavement, a rejuvenator soaks into the asphalt to rebuild strength from within.
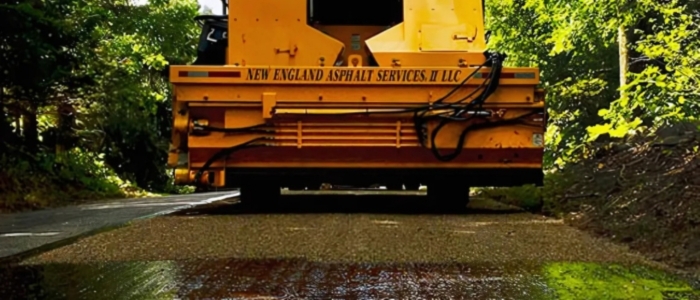
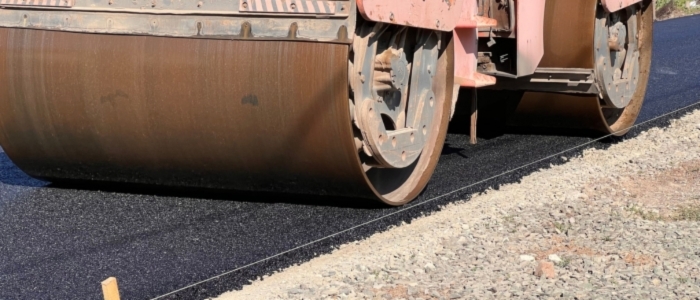
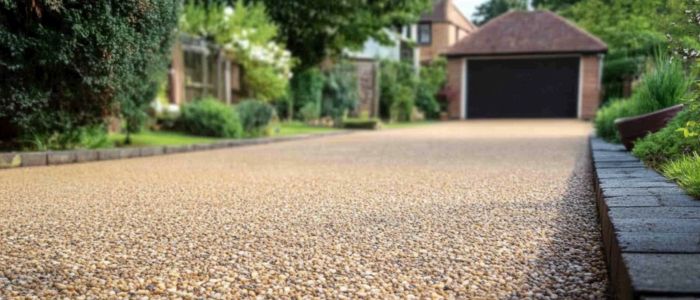
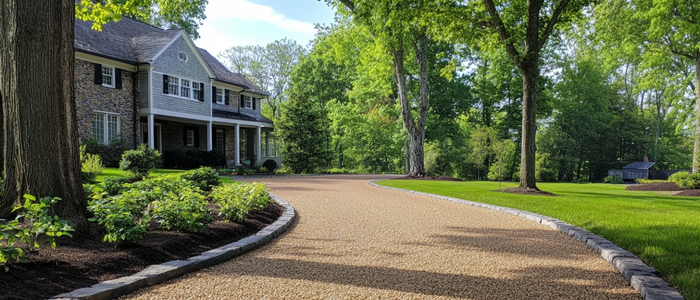
Step 3: Stone Broadcast and Embedding
While the surface is still tacky, a fresh layer of clean, angular stone is spread over the entire driveway. This new aggregate is carefully selected for size, color, and texture to match or improve the original look. The stone is then rolled or tamped to firmly embed it into the rejuvenated surface, creating a bonded, skid-resistant layer that protects the asphalt underneath.
Step 4: Curing and Post-Treatment Care
After installation, the surface needs time to cure, typically within 24 to 48 hours, depending on the weather. During this period, it’s important to limit traffic and allow the oils to fully absorb and the stone to set. Once cured, the driveway is ready for regular use, now protected against water intrusion, UV damage, and daily wear.
Want to compare this to other long-term maintenance strategies? Visit our guide on chip seal driveway maintenance.
Rejuvenation vs. Replacement: Which Does Your Driveway Need?
Not all driveways are good candidates for rejuvenation. The key difference lies in the surface condition and structural integrity of the existing pavement. Here’s how to determine whether rejuvenation is right for your driveway—or if a full replacement is the smarter choice.
When Rejuvenation Is the Right Solution
- Surface oxidation and fading: The color has dulled, and oils have dried out, but the structure is intact.
- Minor stone loss: Some aggregate is loose or missing, but the surface isn’t severely pitted or crumbling.
- Early-stage cracking: Fine, hairline cracks that haven’t deepened or spread across the surface.
- Stable foundation: There are no signs of settling, rutting, or drainage failure underneath the surface.
In these cases, rejuvenation can restore flexibility, reseal the surface, and significantly extend the driveway’s service life, typically by another 5 to 10 years.
When Replacement Is Unavoidable
- Widespread, deep cracking: Cracks that go beyond surface level signal structural failure.
- Base or sub-base issues: Puddling, heaving, or sinking are signs that the foundation has deteriorated.
- Extensive potholes or surface deformation: Severe damage that compromises the integrity of the pavement can’t be resolved with surface treatments.
- Previous poor installation: If the original driveway was not properly constructed, rejuvenation may only offer short-term results.
If you’re unsure where your driveway stands, we recommend reading our breakdown on what type of driveway lasts the longest to better understand material life cycles and treatment options.
Thinking About a New Chip Seal Driveway?
Request a Free Quote
Our team is ready to help you create a durable, beautiful surface that stands the test of time. Contact us today to learn more.
Driveway Maintenance After Rejuvenation: What to Expect
Once your oil and stone driveway has been rejuvenated, regular maintenance becomes both simpler and more important. With proper care, a rejuvenated surface can perform exceptionally well for years, resisting the common issues that lead to premature breakdown.
Routine Maintenance Tips
- Sweep regularly to remove debris and keep the stone layer clear of dirt, leaves, or sediment that can trap moisture.
- Inspect annually for signs of wear, such as loose aggregate, emerging cracks, or areas where oil penetration is fading.
- Keep edges clear of overgrown vegetation, which can trap moisture and degrade the surface.
Avoid Common Mistakes
- Don’t drive on the surface too soon after treatment. Allow the recommended curing time (typically 24–48 hours).
- Avoid heavy turning or sharp braking during the first few weeks to prevent disturbing the stone.
- Don’t skip reapplication: plan to have your driveway evaluated every 5 to 8 years to determine if another rejuvenation is beneficial.
When to Consider Additional Services
If cracks begin to form between rejuvenation cycles, consider targeted crack filling to prevent moisture from penetrating deeper. In harsher climates, additional driveway sealing may provide extra protection between full rejuvenations.
By following these basic care guidelines, you’ll protect the surface from the freeze-thaw cycle, reduce repair costs, and extend the life of your investment.
Cost vs. Long-Term Value: Why Rejuvenation Makes Financial Sense
When evaluating driveway solutions, homeowners often focus on upfront cost, but it’s the long-term value that makes oil and stone driveway rejuvenation stand out. This treatment offers a strategic balance between affordability, performance, and longevity.
Upfront Cost Comparison
While pricing can vary based on location, driveway size, and surface condition, rejuvenation typically costs significantly less than full replacement or repaving. Here’s a general comparison:
- Rejuvenation: More affordable and less labor-intensive; requires fewer materials and less equipment.
- Full Replacement: High labor and material costs; includes demolition, disposal, base work, and new asphalt or concrete.
- Overlays or Repaving: Moderate to high cost depending on thickness and preparation required.
For a more detailed breakdown, see our article on chip and seal driveway cost, which covers surface treatment pricing structures.
Long-Term Value
- Extended lifespan: Adds 5–10 years of service to your existing driveway.
- Fewer repairs: Helps prevent larger issues like deep cracking or base failure.
- Better resale potential: A rejuvenated driveway improves curb appeal, which can positively impact home value.
- Lower environmental impact: Less material use, less waste, and lower energy requirements.
When done at the right time and by experienced professionals, rejuvenation delays the need for a full rebuild, offering homeowners significant savings without sacrificing performance or aesthetics.
Eco-Friendly Benefits of Oil and Stone Driveway Rejuvenation
In addition to saving money and extending pavement life, oil and stone driveway rejuvenation offers several environmental advantages over traditional repaving or full replacement. By preserving the existing surface and minimizing resource use, this method aligns with more sustainable driveway care practices.
Reduced Material Waste
Rejuvenation makes use of your current driveway structure, significantly reducing the need for demolition and disposal of old materials. This keeps tons of asphalt and aggregate out of landfills and reduces the environmental footprint of your maintenance project.
Lower Energy and Emissions
Unlike asphalt replacement, which requires heating, hauling, and extensive equipment use, rejuvenation is a low-impact, cold-applied process. It consumes less energy and generates fewer emissions, especially when using locally sourced materials.
Recyclable and Bio-Based Materials
Many rejuvenating agents are made with bio-based oils or recycled asphalt products, further improving the environmental profile of the treatment. The stone aggregate used in the process is also fully recyclable and often locally sourced.
For more on sustainable paving practices, visit our guide on eco-friendly driveway solutions.
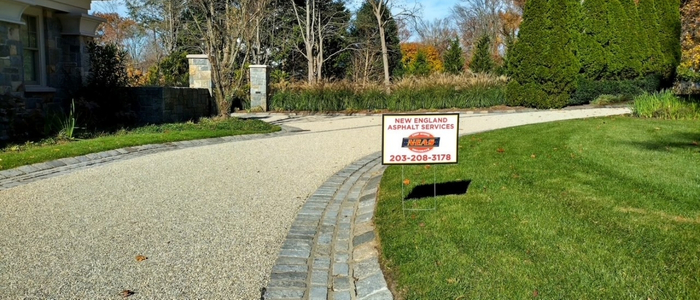
Choosing the Right Contractor for Driveway Rejuvenation
The success and longevity of oil and stone driveway rejuvenation depend heavily on the skill and experience of the contractor performing the work. This isn’t a job for general paving crews or DIY methods, it requires specialized equipment, knowledge of rejuvenating agents, and an understanding of surface conditions.
What to Look for in a Rejuvenation Specialist
- Proven experience with oil and stone surface treatments
- A portfolio of completed projects (ask to see before-and-after photos)
- Familiarity with local climate and surface wear patterns
- Clear explanation of the process, materials used, and curing time
- Proper insurance and licensing
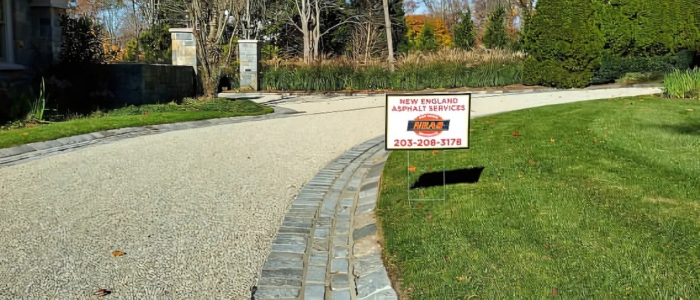
New England Asphalt, for example, has decades of experience providing surface preservation services for residential, municipal, commercial, and industrial properties. Explore our commercial paving services o rmunicipal paving solutions to see the range of our capabilities.
Questions to Ask Before Hiring
- What type of rejuvenator will be used?
- How will the surface be prepared in advance?
- What kind of aggregate will be applied?
- What’s the expected lifespan of the treatment?
- Are maintenance or follow-up services offered?
Always Get a Detailed Quote
When comparing estimates, don’t just look at the bottom line. Make sure each quote includes:
- Surface preparation
- Material specifications
- Application process
- Curing time
- Warranty or service guarantees
For more on comparing treatment options, see our insights on chip seal driveway benefits and how they relate to long-term maintenance planning. Reach out to us today!
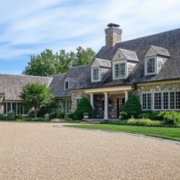
Case Studies: Successful Projects
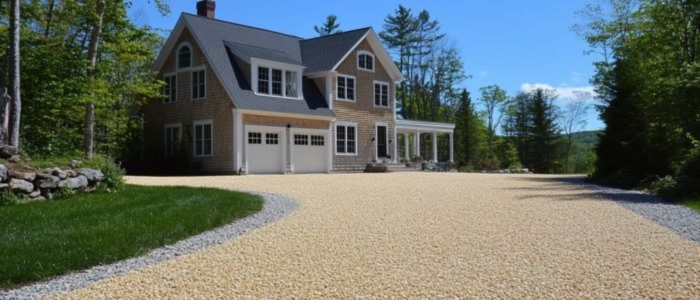
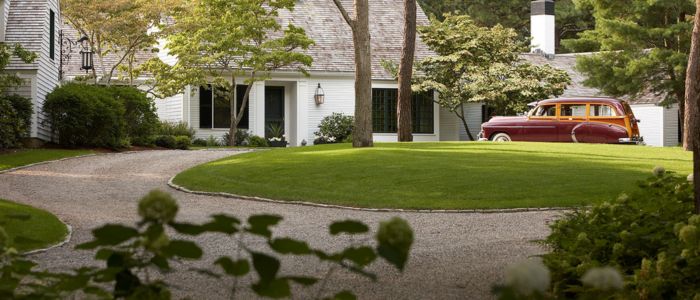
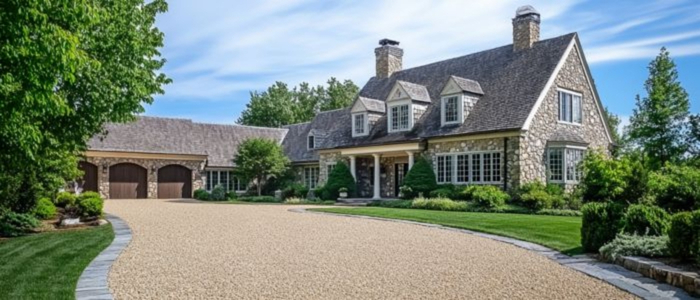
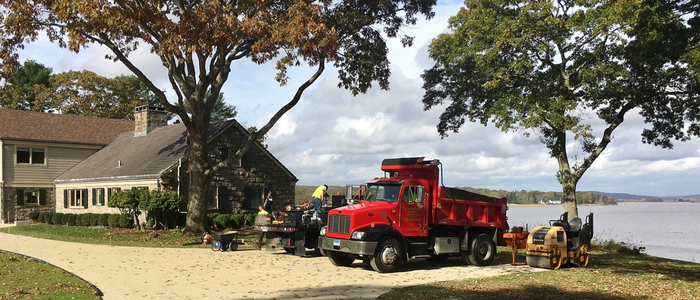
Martha’s Vineyard
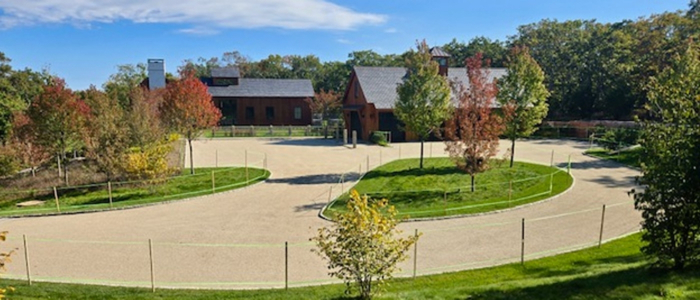
New England Asphalt completed a premium oil and stone driveway rejuvenation at the main residence of a 100-acre Arabian horse farm on Martha’s Vineyard.
The coastal environment presented challenges, including sun exposure, salt air, and seasonal weather shifts, which had caused fading and minor surface wear. Rather than opting for a full replacement, the property owner chose rejuvenation for its cost-efficiency and aesthetic value.
The team applied a rejuvenating asphalt emulsion followed by clean, angular stone, restoring the driveway’s rich appearance and structural resilience. This approach offered a skid-resistant, water-resistant surface well-suited for the estate’s functional needs and upscale presentation.
The project exemplifies how rejuvenation can extend driveway life by up to a decade while improving curb appeal, delivering a long-term solution with minimal disruption to a high-traffic, high-value property.
Martin House
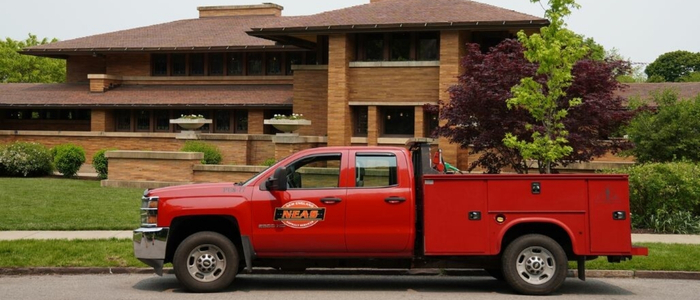
As part of a $100 million restoration of Frank Lloyd Wright’s Martin House in Buffalo, New England Asphalt was selected to restore the carriage house driveway using a chip seal process aligned with historic preservation standards. Maintaining architectural integrity was critical, so the stone aggregate was sourced from the same quarry Wright originally used.
The team applied a rejuvenating treatment followed by hand-selected stone to deliver a surface that met both modern performance standards and strict historical requirements. This sensitive application enhanced traction, protected against water damage, and blended seamlessly with the landmark’s original design.
The project earned top marks from preservation officials and demonstrates how oil and stone rejuvenation can be tailored for heritage sites. It highlights New England Asphalt’s ability to provide environmentally responsible, durable treatments even under complex regulatory oversight.
If your driveway is showing signs of aging, now is the time to schedule an evaluation. Contact us today, our team at New England Asphalt can help you determine what is the right solution for your property.
Frequently Asked Questions
Yes, oil and stone rejuvenation is particularly effective for long, private, or rural driveways, where cost-effective, low-maintenance solutions are ideal.
Sealcoating sits on top of the pavement as a protective layer, whereas rejuvenation penetrates the surface to restore lost oils and flexibility. Rejuvenation also includes the application of new aggregate for enhanced structure and traction.
Due to the technical nature of the materials, surface preparation, and application methods, rejuvenation is not recommended as a DIY project. Hiring professionals like New England Asphalt ensures proper curing, material compatibility, and long-term performance.
Professionals select complementary aggregates for color and texture, but exact matching may not always be possible, especially for older surfaces. However, the result is often a more uniform, refreshed appearance.
This depends on the condition and type of sealcoat used. A surface evaluation by a professional is necessary to determine compatibility before rejuvenation.
Thinking About a New Chip Seal Driveway?
Request a Free Quote
Our team is ready to help you create a durable, beautiful surface that stands the test of time. Contact us today to learn more.
Final Thoughts: Is Oil and Stone Driveway Rejuvenation Right for You?
If your driveway is beginning to show signs of aging, fading color, minor cracking, or scattered stone, but still has a solid foundation, oil and stone driveway rejuvenation is a highly effective and affordable solution. It restores your surface’s strength, texture, and appearance, all while preventing more serious damage and delaying costly replacement.
This process is ideal for homeowners looking to protect their investment, improve curb appeal, and make environmentally responsible maintenance choices. When performed by skilled professionals using the right materials, rejuvenation can add years of life to your driveway with minimal disruption to your property or routine.
For the best results, partner with a trusted contractor experienced in chip seal, oil, and stone applications. At New England Asphalt, we specialize in surface treatments that are durable, cost-effective, and built for New England’s unique climate challenges. To learn more or schedule an evaluation, visit our page on chip seal driveways or contact our team directly.